Saturday, June 8, 2024

Calculate resistor for LED

 Q. Howdy, Brother!  What resistor should I use if I have a yellow 10mm LED Emitting Diode (1.8-2.2V)  powered by two AA Batteries?  I will have an on/off switch in the loop.  Will 47 ohms work?  i tried 100 ohm resistor but the batteries were getting hot.  I'm not even sure if I asked the question properly . Thanks for any assistance.


LED Resistor Calculator


First, let's clarify the details:

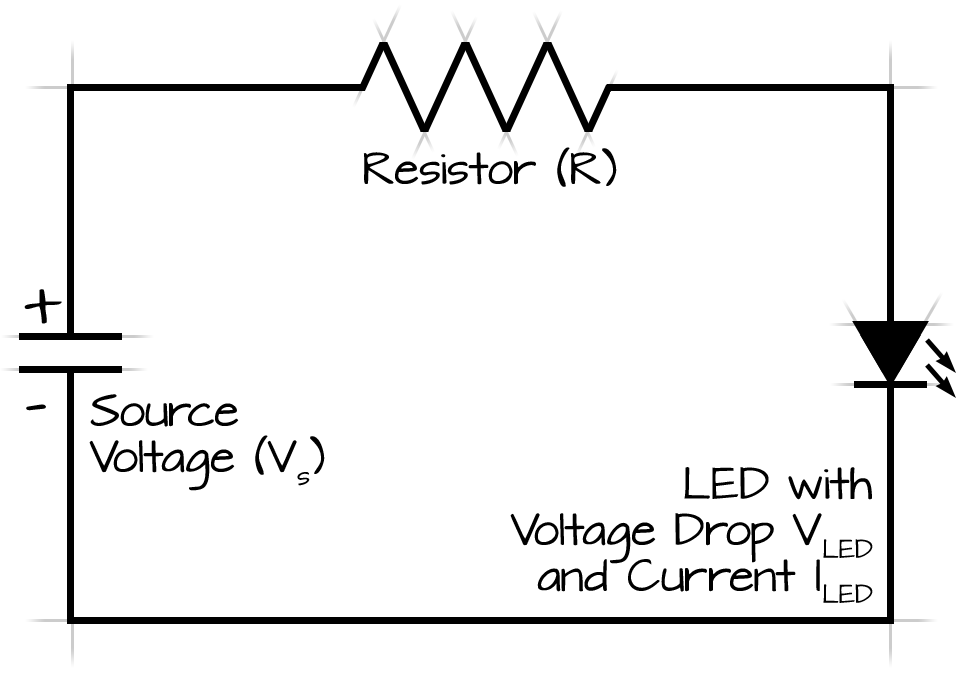
- You have a yellow LED with a forward voltage of 1.8-2.2V.
- You are powering it with two AA batteries. Assuming each AA battery is 1.5V, the total voltage is 3V.
- You previously used a 100 ohm resistor, but the batteries got hot, indicating too much current draw.

Let's calculate the appropriate resistor value using Ohm's Law.

Ohm's Law formula: R=VsupplyVLEDILEDR = \frac{V_{supply} - V_{LED}}{I_{LED}}

Where:

  • VsupplyV_{supply} is the total voltage from the batteries.
  • VLEDV_{LED} is the forward voltage of the LED.
  • ILEDI_{LED} is the desired current through the LED. For most standard LEDs, a safe current is around 20mA (0.02A).


Using the maximum forward voltage of 2.2V for the LED (to be safe), we get:

R=3V2.2V0.02AR = \frac{3V - 2.2V}{0.02A}=0.8V0.02AR = \frac{0.8V}{0.02A}=40 ohms            R = 40 \text{ ohms}

So, a 40 ohm resistor would be ideal. Since 40 ohms is not a standard resistor value, you can use the closest higher standard resistor value to ensure the current is slightly lower rather than higher. The next standard value is 47 ohms.


Check the current with a 47 ohm resistor:

I=VsupplyVLEDRI = \frac{V_{supply} - V_{LED}}{R}=3V2.2V47 ohmsI = \frac{3V - 2.2V}{47 \text{ ohms}}=0.8V47 ohmsI = \frac{0.8V}{47 \text{ ohms}}   = I \appr                I = 17mAI \approx 17mA

Using a 47 ohm resistor, the current will be approximately 17mA, which is safe for most LEDs.

So yes, a 47 ohm resistor should work well for your setup. It will limit the current to around 17mA, which is within the safe operating range for your LED and should prevent your batteries from getting hot.

If you encounter any further issues, let me know!


Wednesday, October 4, 2023

Led Blinking

Project No.01.  LED Blinking it’s turn on and off


It is the simple basic project created using Arduino. LED (Light Emitting Diode) is an electronic device, which emits light when the current passes through its terminals. LED's are used in various applications. It is also used as an ON/OFF indicator in different electronic devices.

In this project, we will connect the LED to the digital pin on the Arduino board. The LED will work as a simple light that can be turned ON and OFF for a specified duration.

Hardware Required : Arduino Board, LED, Resistor 220


CODE


void setup()

{

  pinMode(13, OUTPUT);     // pin# 13 is output

}

void loop()

{

  digitalWrite(13, HIGH);   // turn the LED ON

  delay(1000);              // wait for a second

  digitalWrite(13, LOW);    // turn the LED OFF

  delay(1000);              // wait for a second

}


Description of the code


 ..................................................................
MD. ANWARUL ISLAM
M.Sc. In EEE (PUST) | B.Sc. In EEE | B.Sc. In CSE
Diploma In Electrical Engineering
Electrical Supervisor License A. B. C

CEO and Embedded Software & PCB Design Engineer
Automation Research & Embedded Technologies
www.aretbd.com

Experience (12 Years):
MCU and PLC programming, PCB design and fabrication,SMT machines,
Mobile manufacturing M/C, Textile machines,VFD, Nano technology.


Featured Post

Calculate resistor for LED

 Q. Howdy, Brother!  What resistor should I use if I have a yellow 10mm LED Emitting Diode (1.8-2.2V)  powered by two AA Batteries?  I will ...